

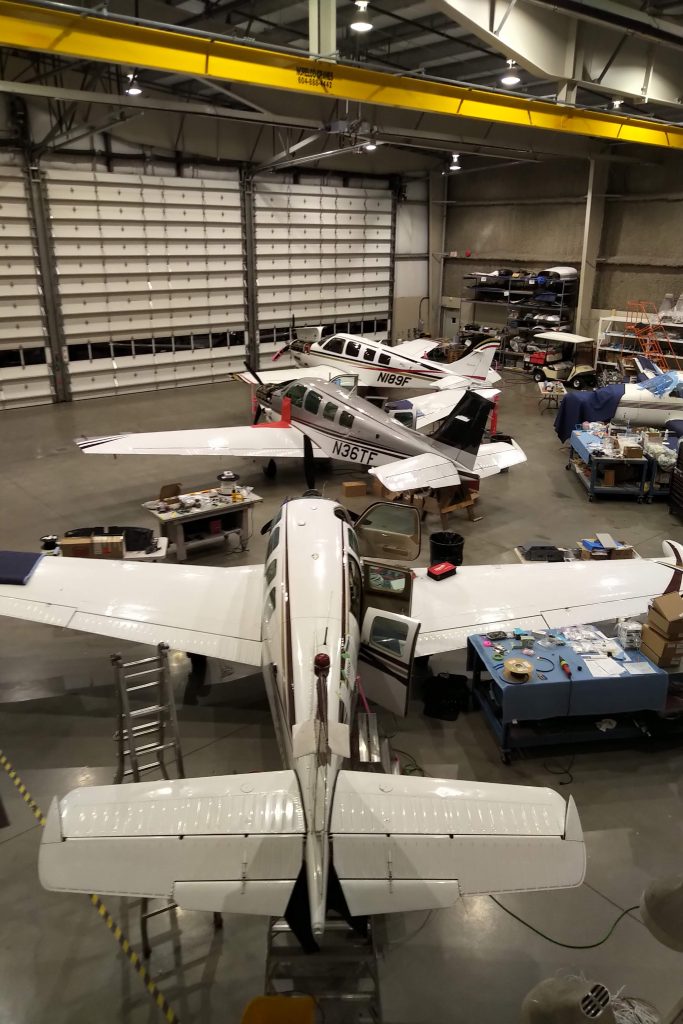
With more than 17,000 produced worldwide, these three Bonanza’s are sure to stand out amongst the crowd. Maxcraft installed nearly identical glass panels in three different Bonanzas at the same time.
A Bonanza of Glass Panel Upgrades
In the world of avionics much of our work is custom and unique to the aircraft we install it in. It’s not common to complete two projects with similar airframes and a similar avionics package, let alone three. While Maxcraft is highly experienced with working on Bonanza’s, this was a first. Three Bonanza owners reached out to us individually all looking for a similar installation. This was entirely by chance, with no prior planning. All three Bonanzas were relatively modern 36TC models built between 1980 and 2001.
Almost every major project we work on is unique and brings its own set of challenges to work through. With these installations being so similar and on almost identical airframes we were able to apply lessons we learned on the first aircraft onto the next two to make the process even more efficient as we progressed. To take advantage of this efficiency even more we staged the installations to start with a buffer between all three, allowing each aircraft to be at a different stage while in our hangar.
One new challenge we faced with this project were border restrictions caused by the COVID-19 pandemic. With two of the three Bonanzas being registered and located in the United States, a mass closure of most ports of entry in Canada made things difficult. While bringing aircraft over the border for isn’t usually a problem, and we have plenty of experience working on American registered aircraft. After some research into the restrictions, we determined we could still bring the aircraft over the border by using a commercial ferry pilot. To make this process as easy as possible for the customers, Maxcraft provided a pilot to fly down to each Bonanza and fly the aircraft up to Maxcraft.
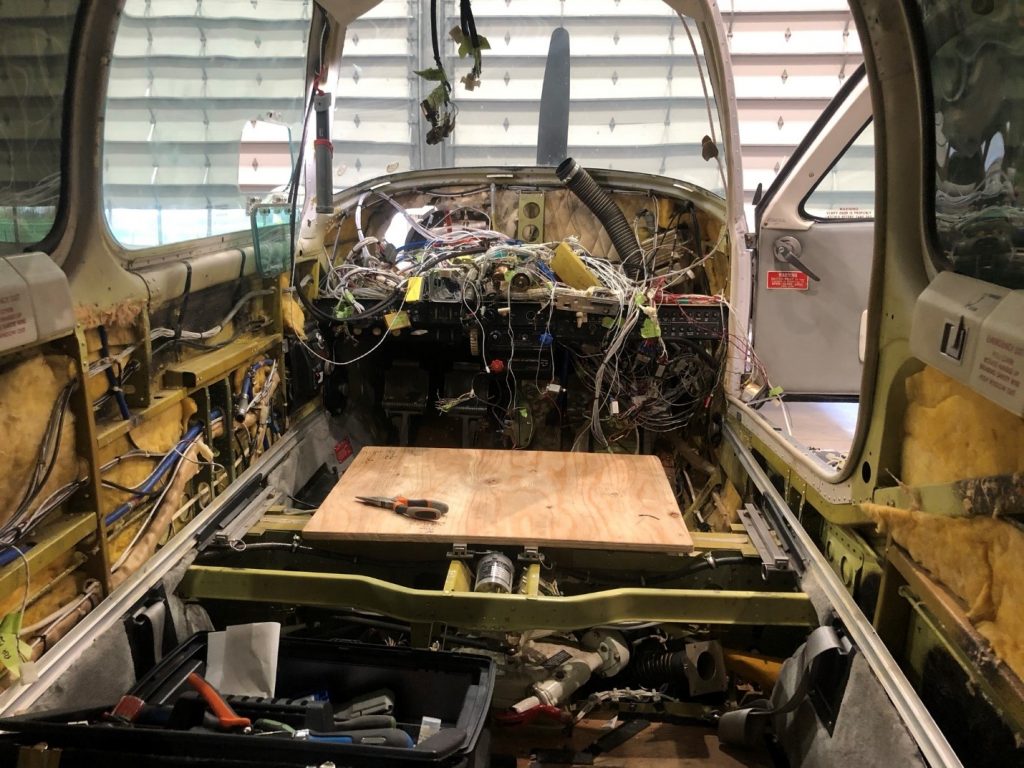
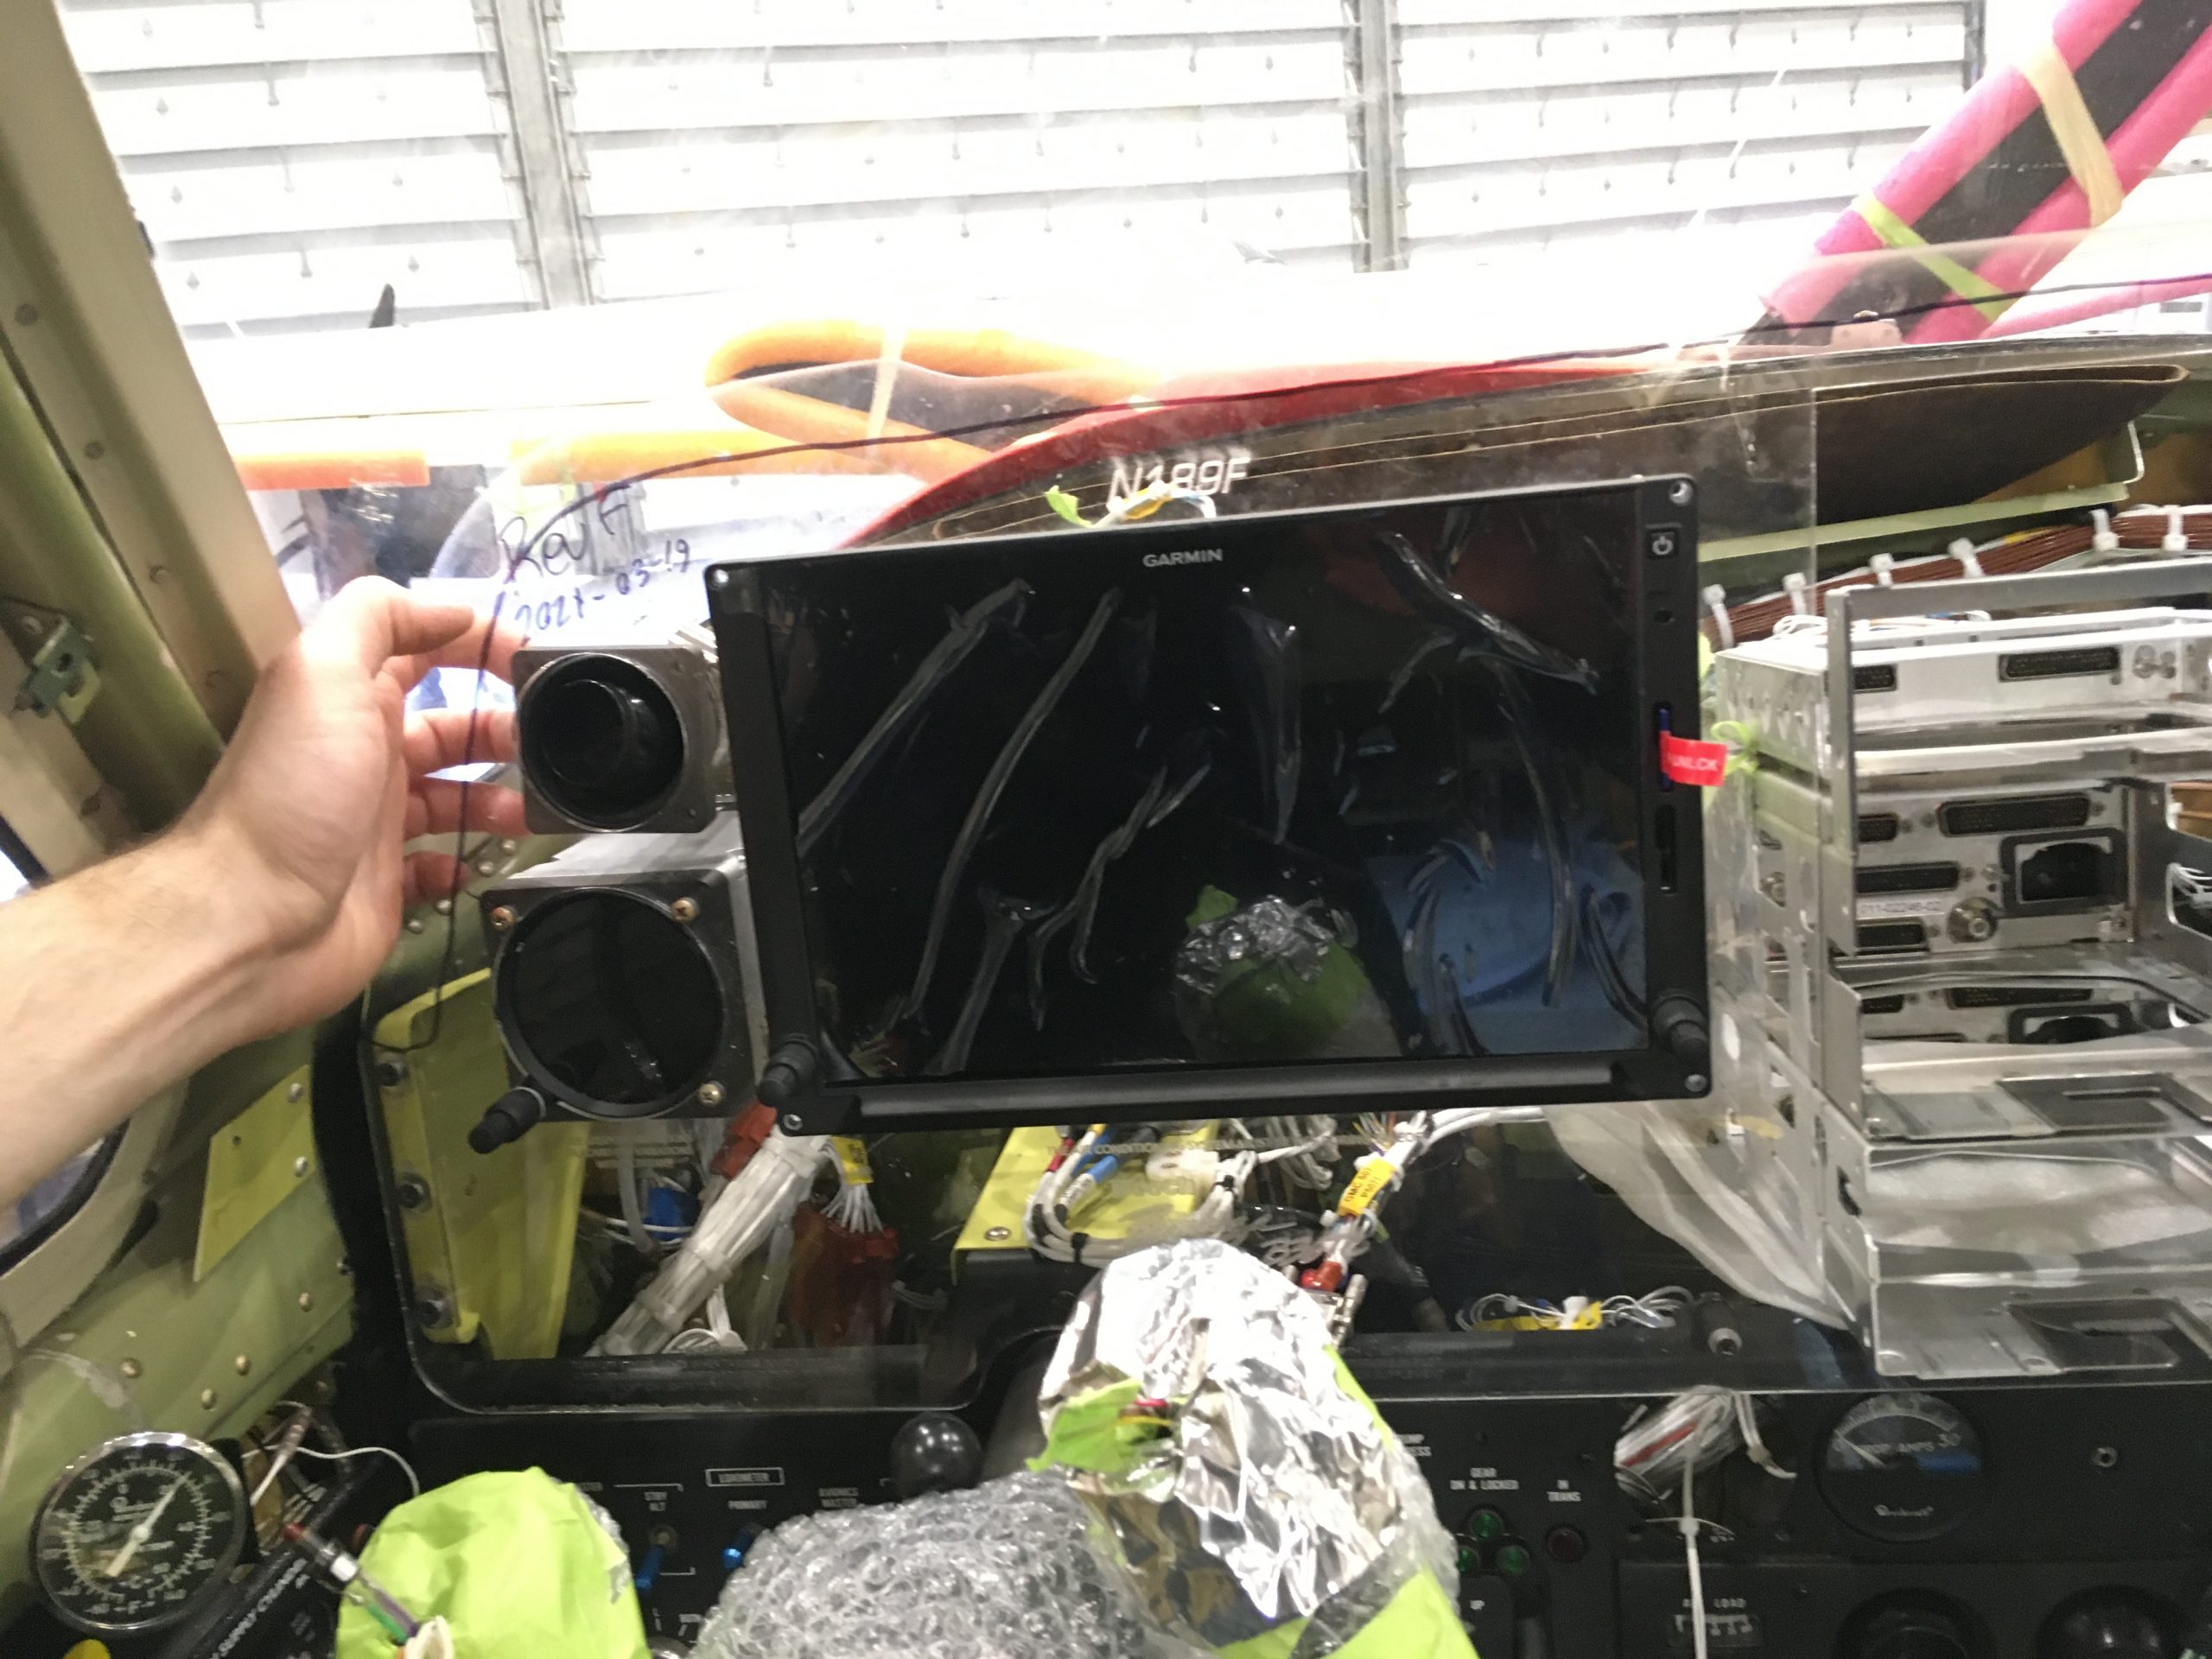
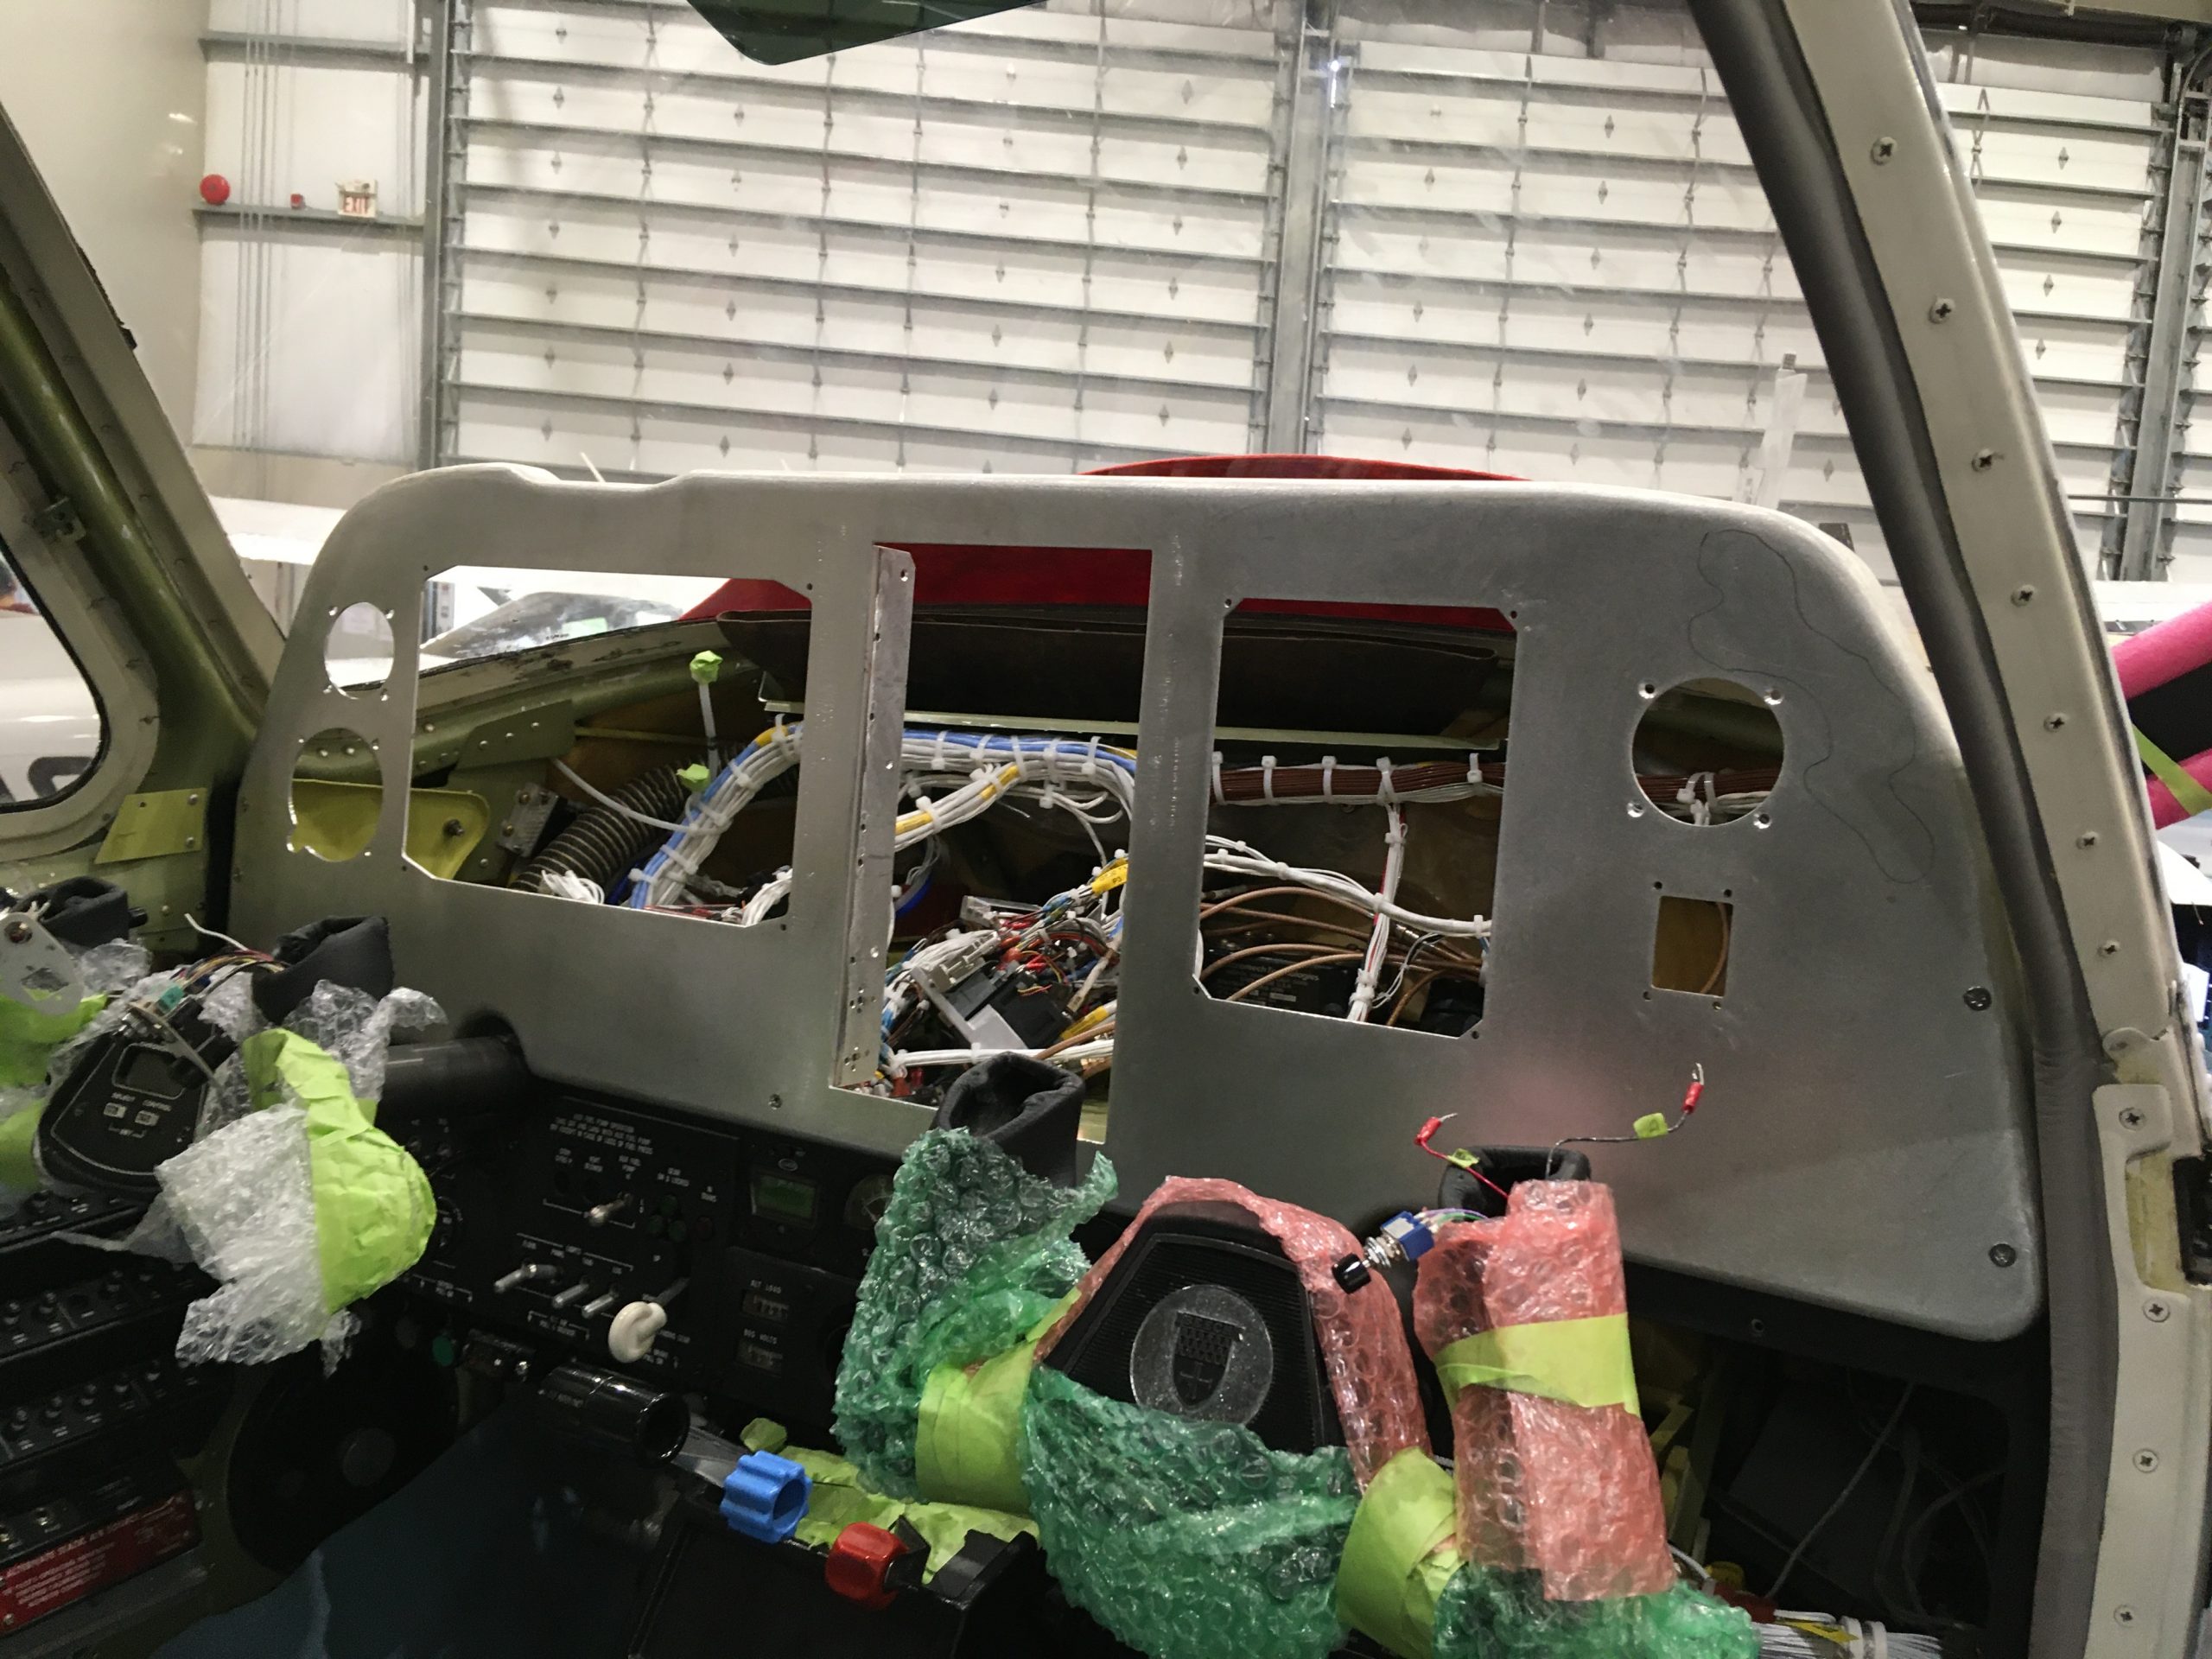
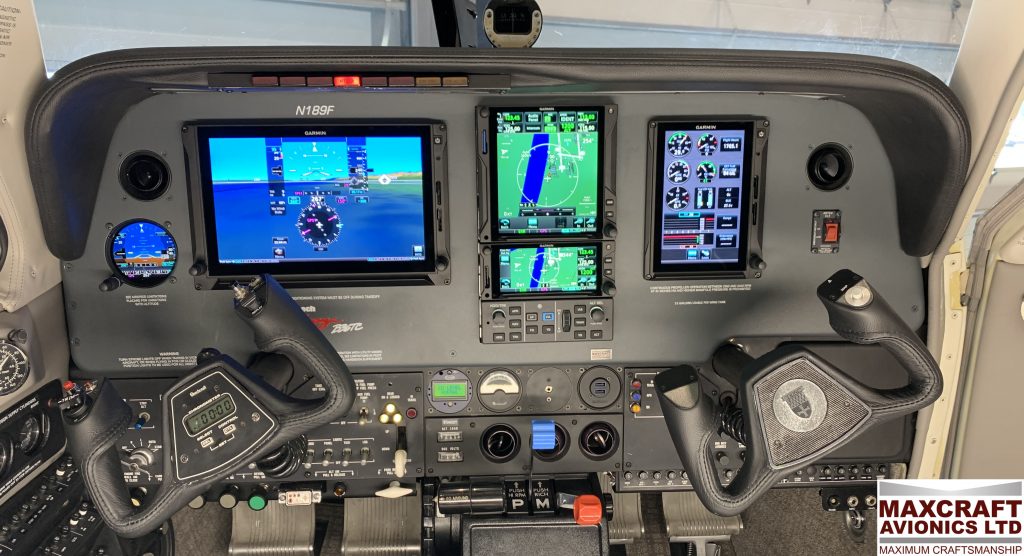
All three received the biggest avionics upgrade you can do on an aircraft. This involved removing almost all the preexisting instruments, avionics, and wiring and even the panel and replacing them. All three customers decided on extremely similar installations based around Garmin’s G500 TXi line of touchscreen flight displays. Almost all the mechanical gauges and instruments are replaced by high resolution touchscreens making critical information easy to read.
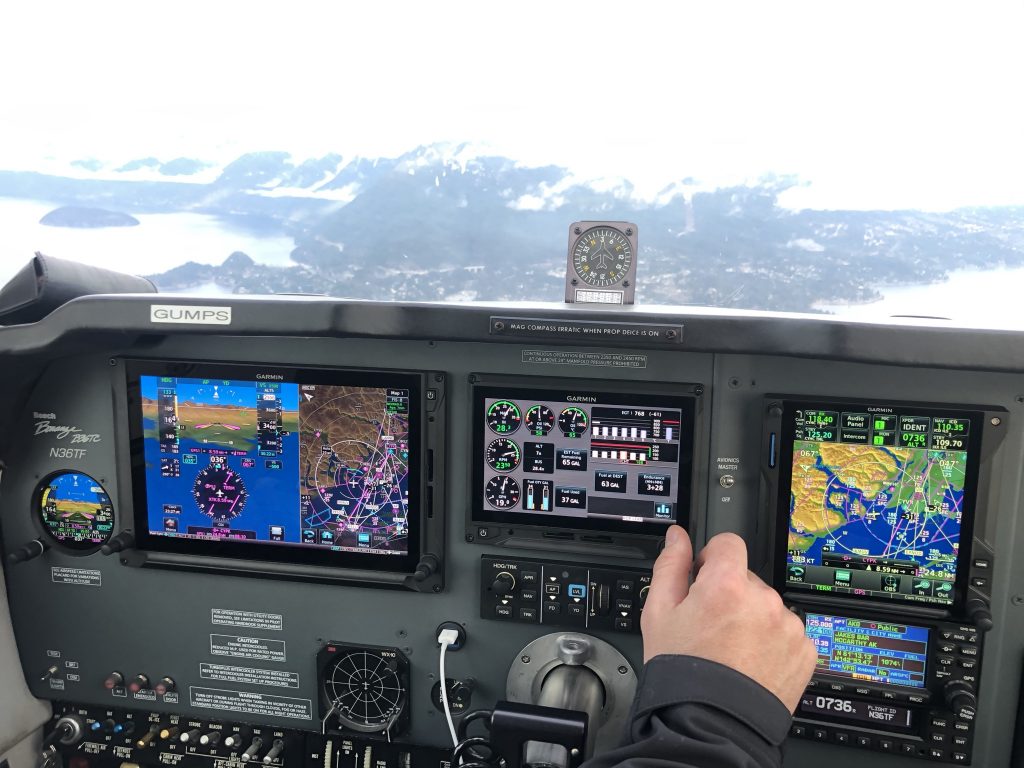
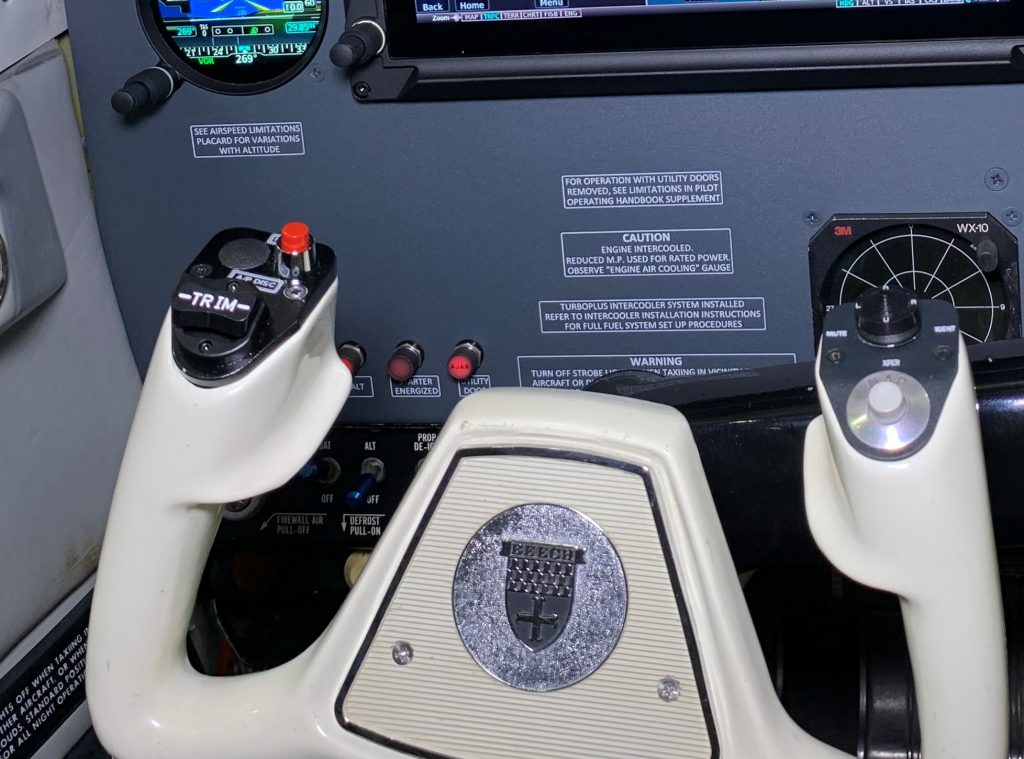
The large 10.6” G500 TXi display centered over the pilot’s yoke will be the primary flight display (PFD). With almost limitless ways to customize how much or how little information is displayed, you can choose to have a simple full screen PFD or split the screen into two sections displaying both a PFD, and a multi-function display with mapping, weather, traffic, or other information of your choice. The GTN 750 and GTN 650 integrate seamlessly with the G500 TXi. Both will provide GPS navigation, and VHF communications and navigation. They also integrate with the GTX 345 transponder allowing you to change your squawk code directly on the touch screen. Along with control of the transponder, the GTN 750 also enables control of the Garmin GMA 35 audio panel graphically and offers independent volume control for the pilot, copilot, and passengers allowing you the pilot to focus on radio communications. Both the transponder and audio panel can optionally be remote mounted and exclusively controlled through the GTN 750 freeing up valuable panel real estate.
By installing an air data and solid-state attitude and heading reference system (ADAHRS), we were able to remove the old-fashioned vacuum system and gyro instruments. This nets two major benefits. The first is the reliability gained with the removal of moving parts. Gyroscopes are incredibly fragile, and overhauls can be expensive. Secondly, there is a net weight reduction, increasing the aircraft’s useful load.
The GI275 will serve primarily as a standby instrument complimenting the G500 TXi display. While the electronic displays are extremely reliable, safety is still the top priority. The pilot may not have a need to use the GI275 on every flight, but it’s an important piece of equipment, and a legal requirement. When flying in instrument meteorological conditions, an instrument failure can be incredibly dangerous. With an internal 60-minute backup battery, the GI275 will continue to operate even during a complete electrical failure. Unlike traditional standby gauges, the GI275 can provide almost all the same information as the G500 TXi, including the usual airspeeds, and altitudes, and it can also provide many multifunction display (MFD) features, such as traffic awareness, weather, or even showing the entire synthetic vision sight picture to provide terrain awareness.
Garmin’s TXi Engine Information System (EIS) simplifies engine monitoring by replacing analogue gauges with a digital interface. Indications can be viewed on the G500 TXi PFD, or on a dedicated portrait or landscape 7” touchscreen display. The EIS will provide you with information specific to your engine and aircraft, allowing you to know what is going on during every stage of your flight. Lean assist will help you optimize your mixture settings to ensure your engine is running as efficient as possible. Data logging is built in and can be automatically and wirelessly transferred from your aircraft to the Garmin Pilot app. This data allows you to review flight on the ground with all the data pushed to the cloud, including important details such as exact GPS positions, and your engine’s exact performance post-flight, or be sent to your maintenance technician, allowing them to spot any possible issues or areas of concern. Most importantly if any faults are detected in flight, such as fuel imbalances, or exceeding engine limits, the EIS will immediately notify you by presenting an alert on both the EIS display and the PFD allowing you to take action to correct the fault.
The GFC 500 digital autopilot from Garmin is an advanced autopilot for general aviation aircraft. Providing precise and smooth control in flight, the GFC 500 connects to the G500 TXi system sending information back and forth constantly to provide attitude information, and to display autopilot status on the PFD. The GFC 500 has a lengthy list of safety enhancing features including the “LVL” button which will automatically bring the aircraft from almost any attitude to straight and level flight allowing the pilot to find their bearings if they become disoriented, or unintentionally enter instrument flight conditions. The autopilot even enhances safety when the pilot is hand flying the aircraft. Stability protection will gently nudge the controls toward stable flight when certain conditions are exceeded.
With all this technology, flying a light-weight piston aircraft feels like flying an airliner. Almost any avionics shop can install Garmin equipment, where we make the difference is integrating every system to maximize features, so it feels like a well-designed and thought-out factory installation. While this article described the bulk of what we installed in all three Bonanza’s you can read more about the differences each aircraft had below.
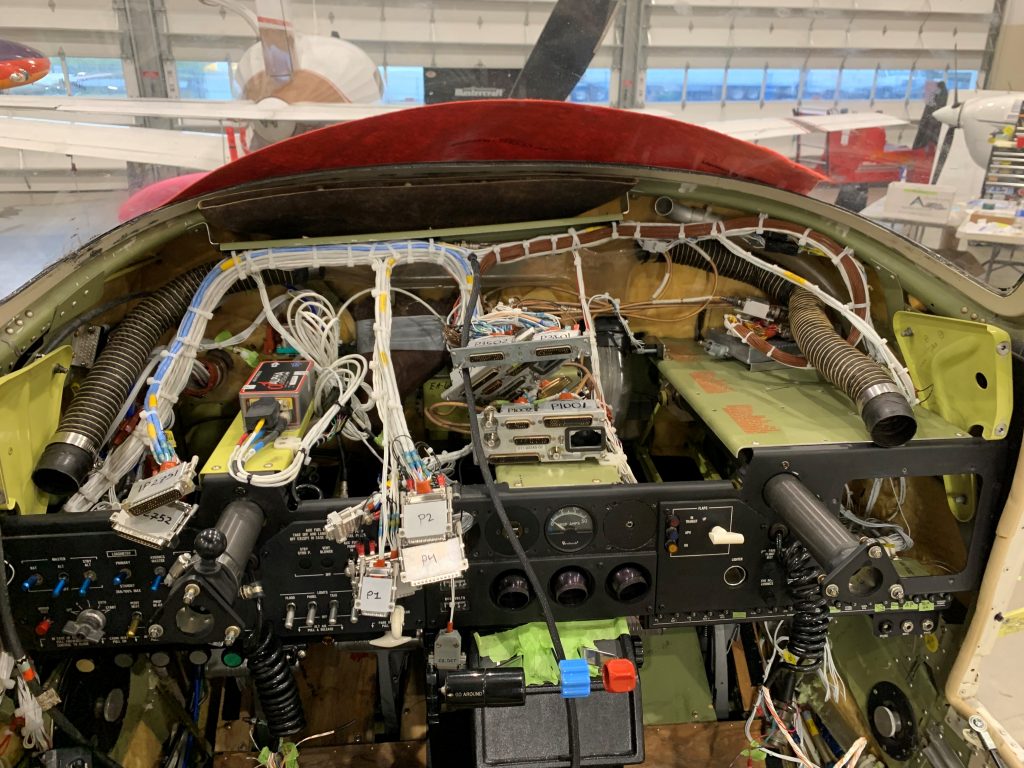
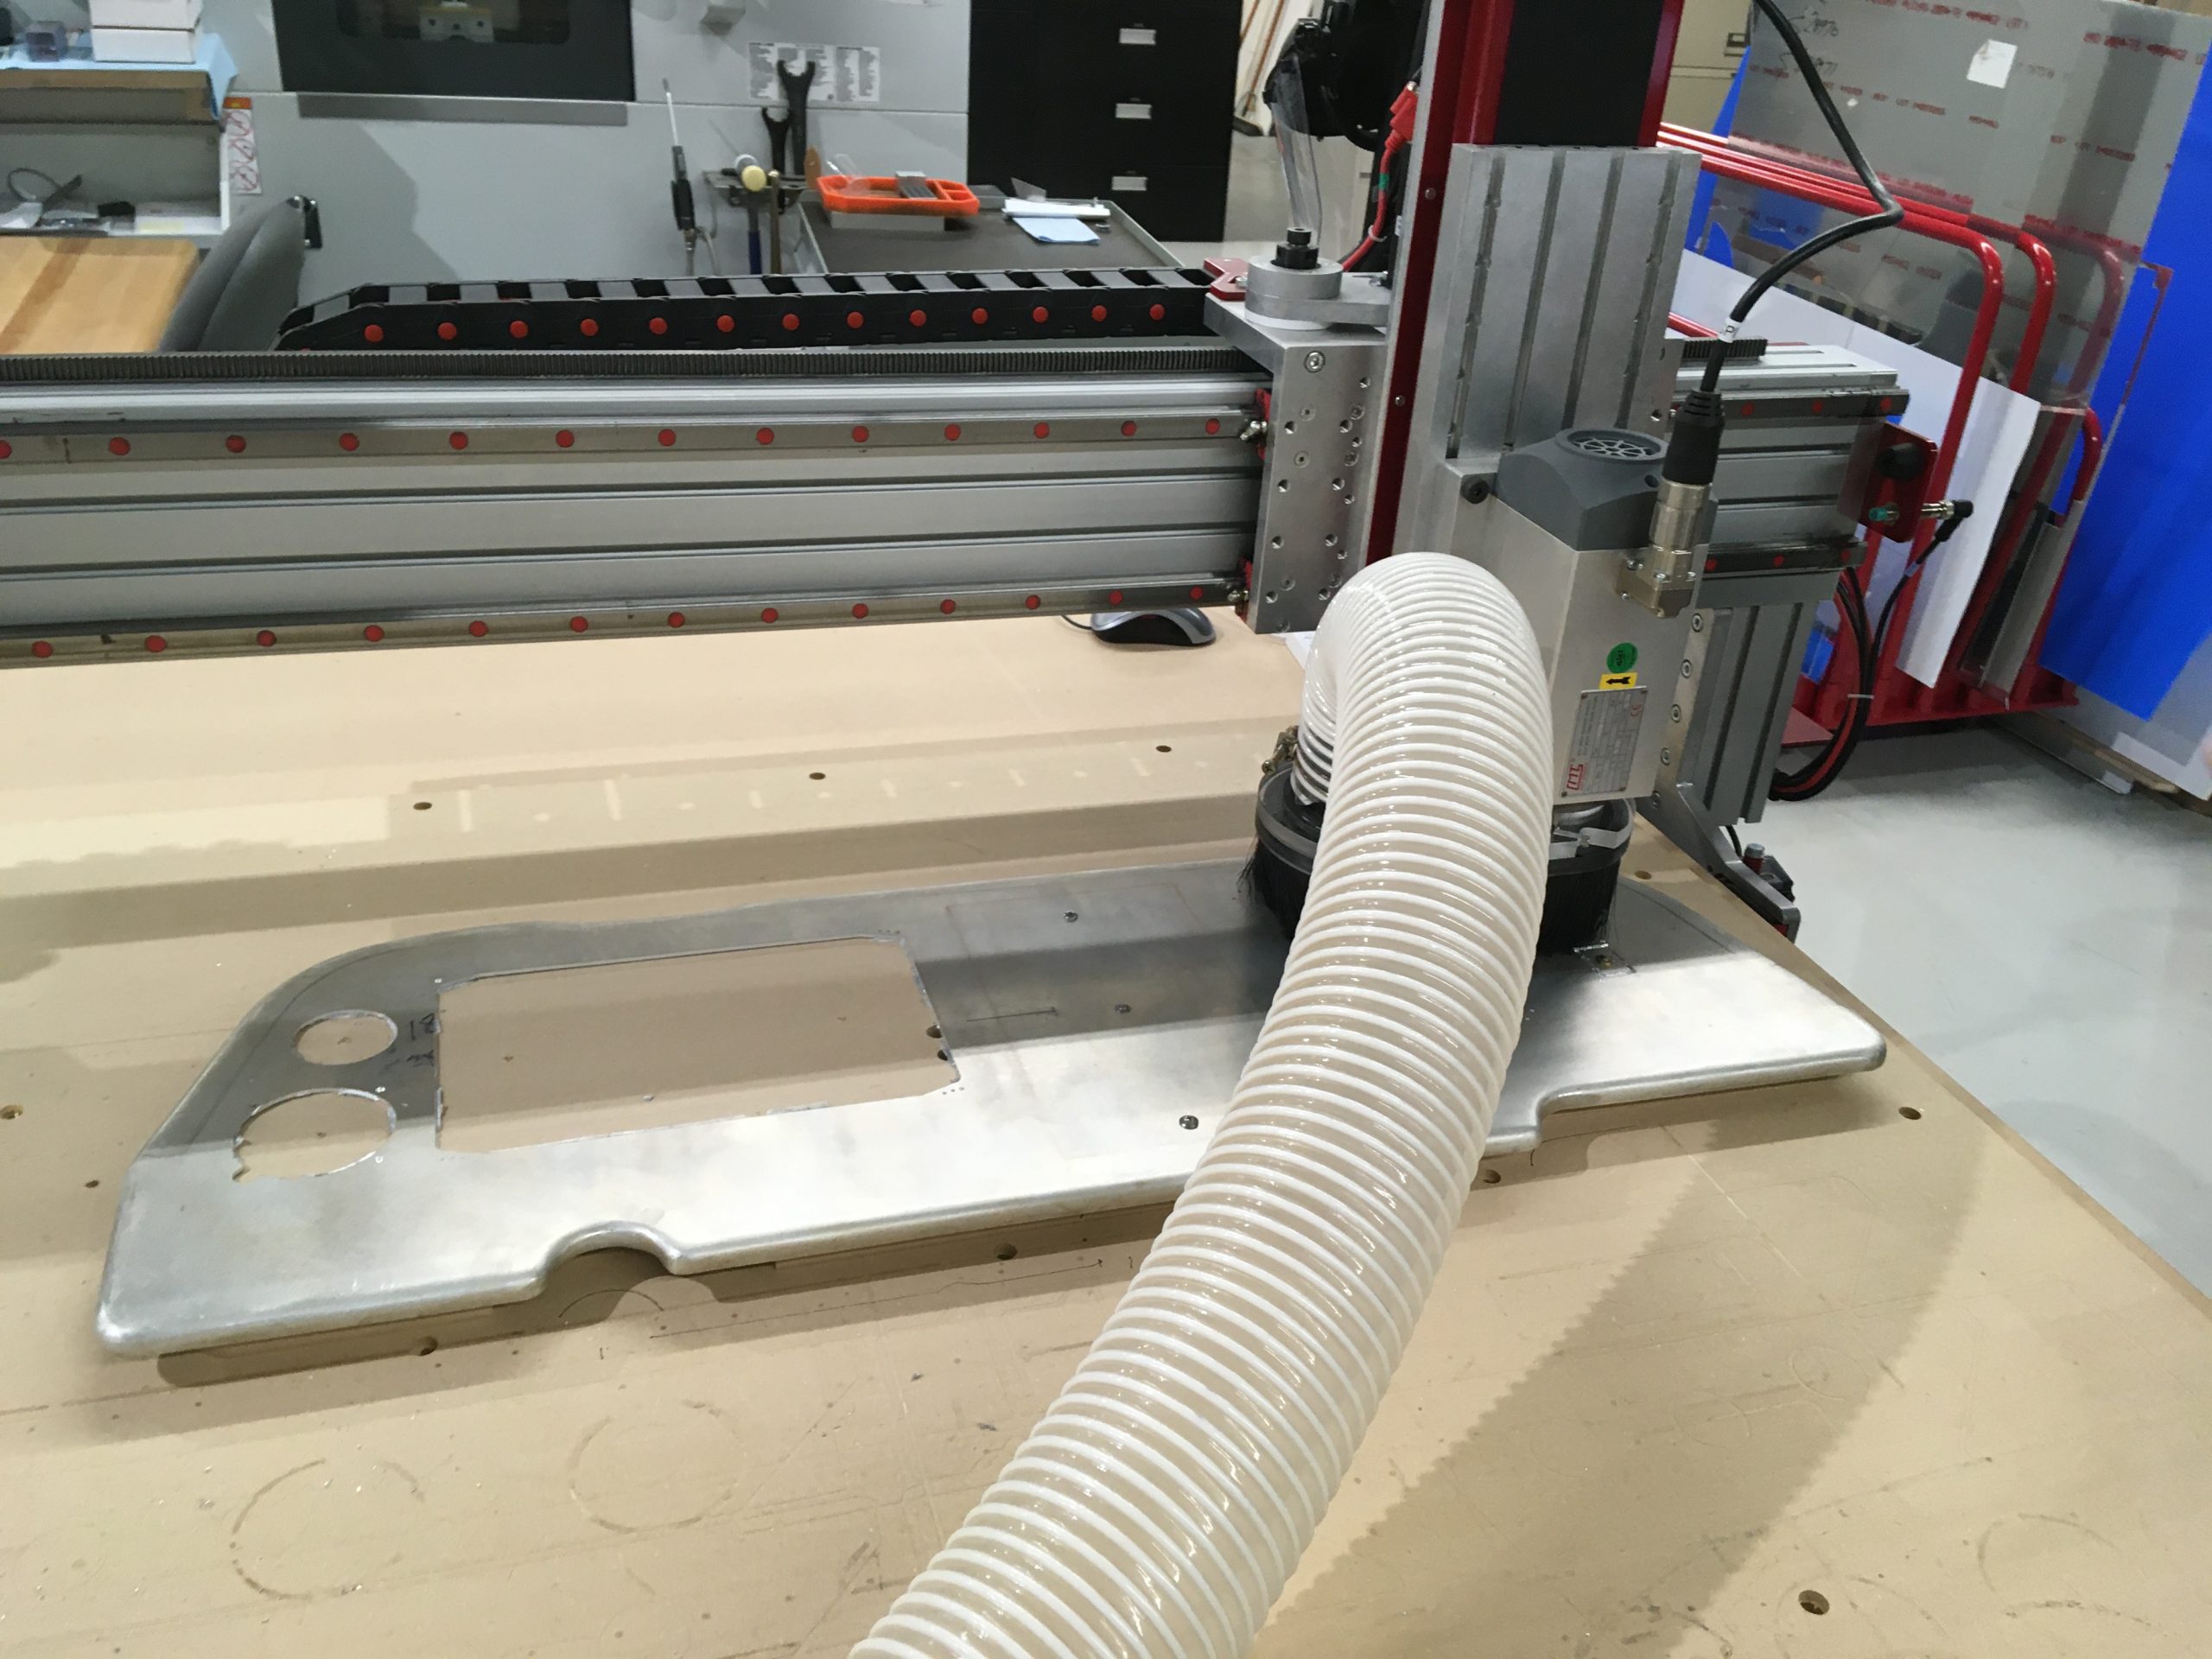
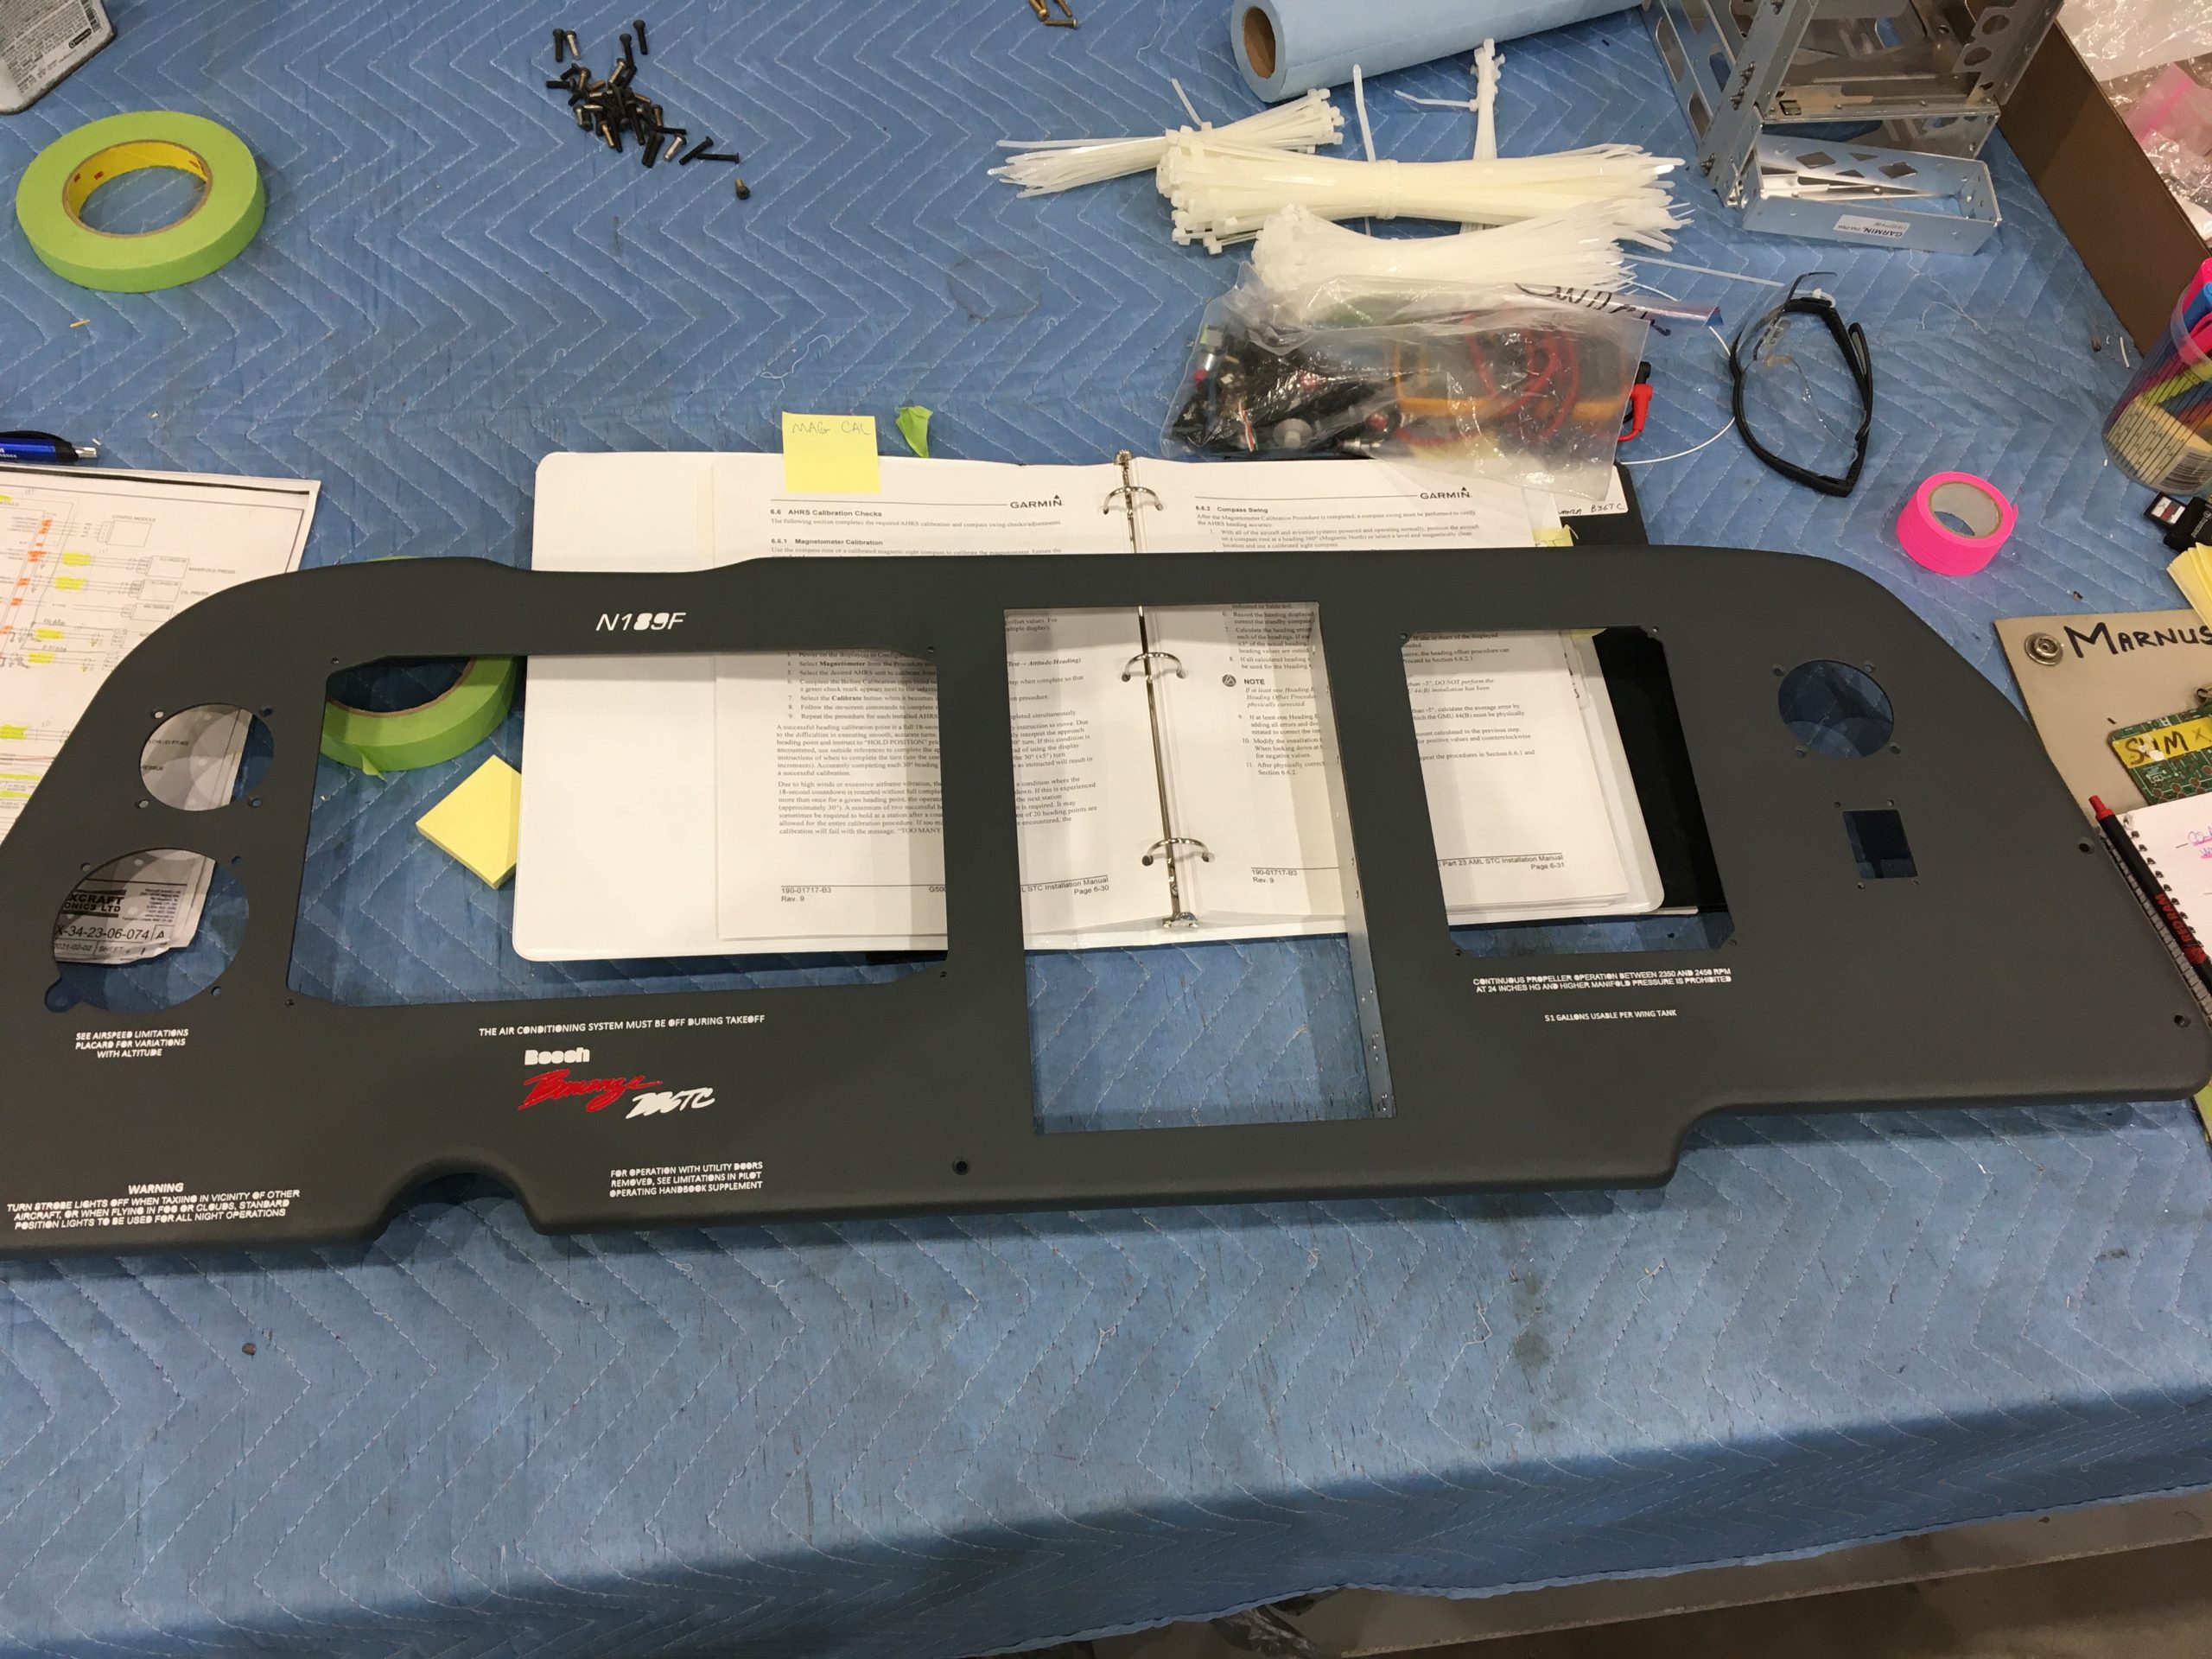
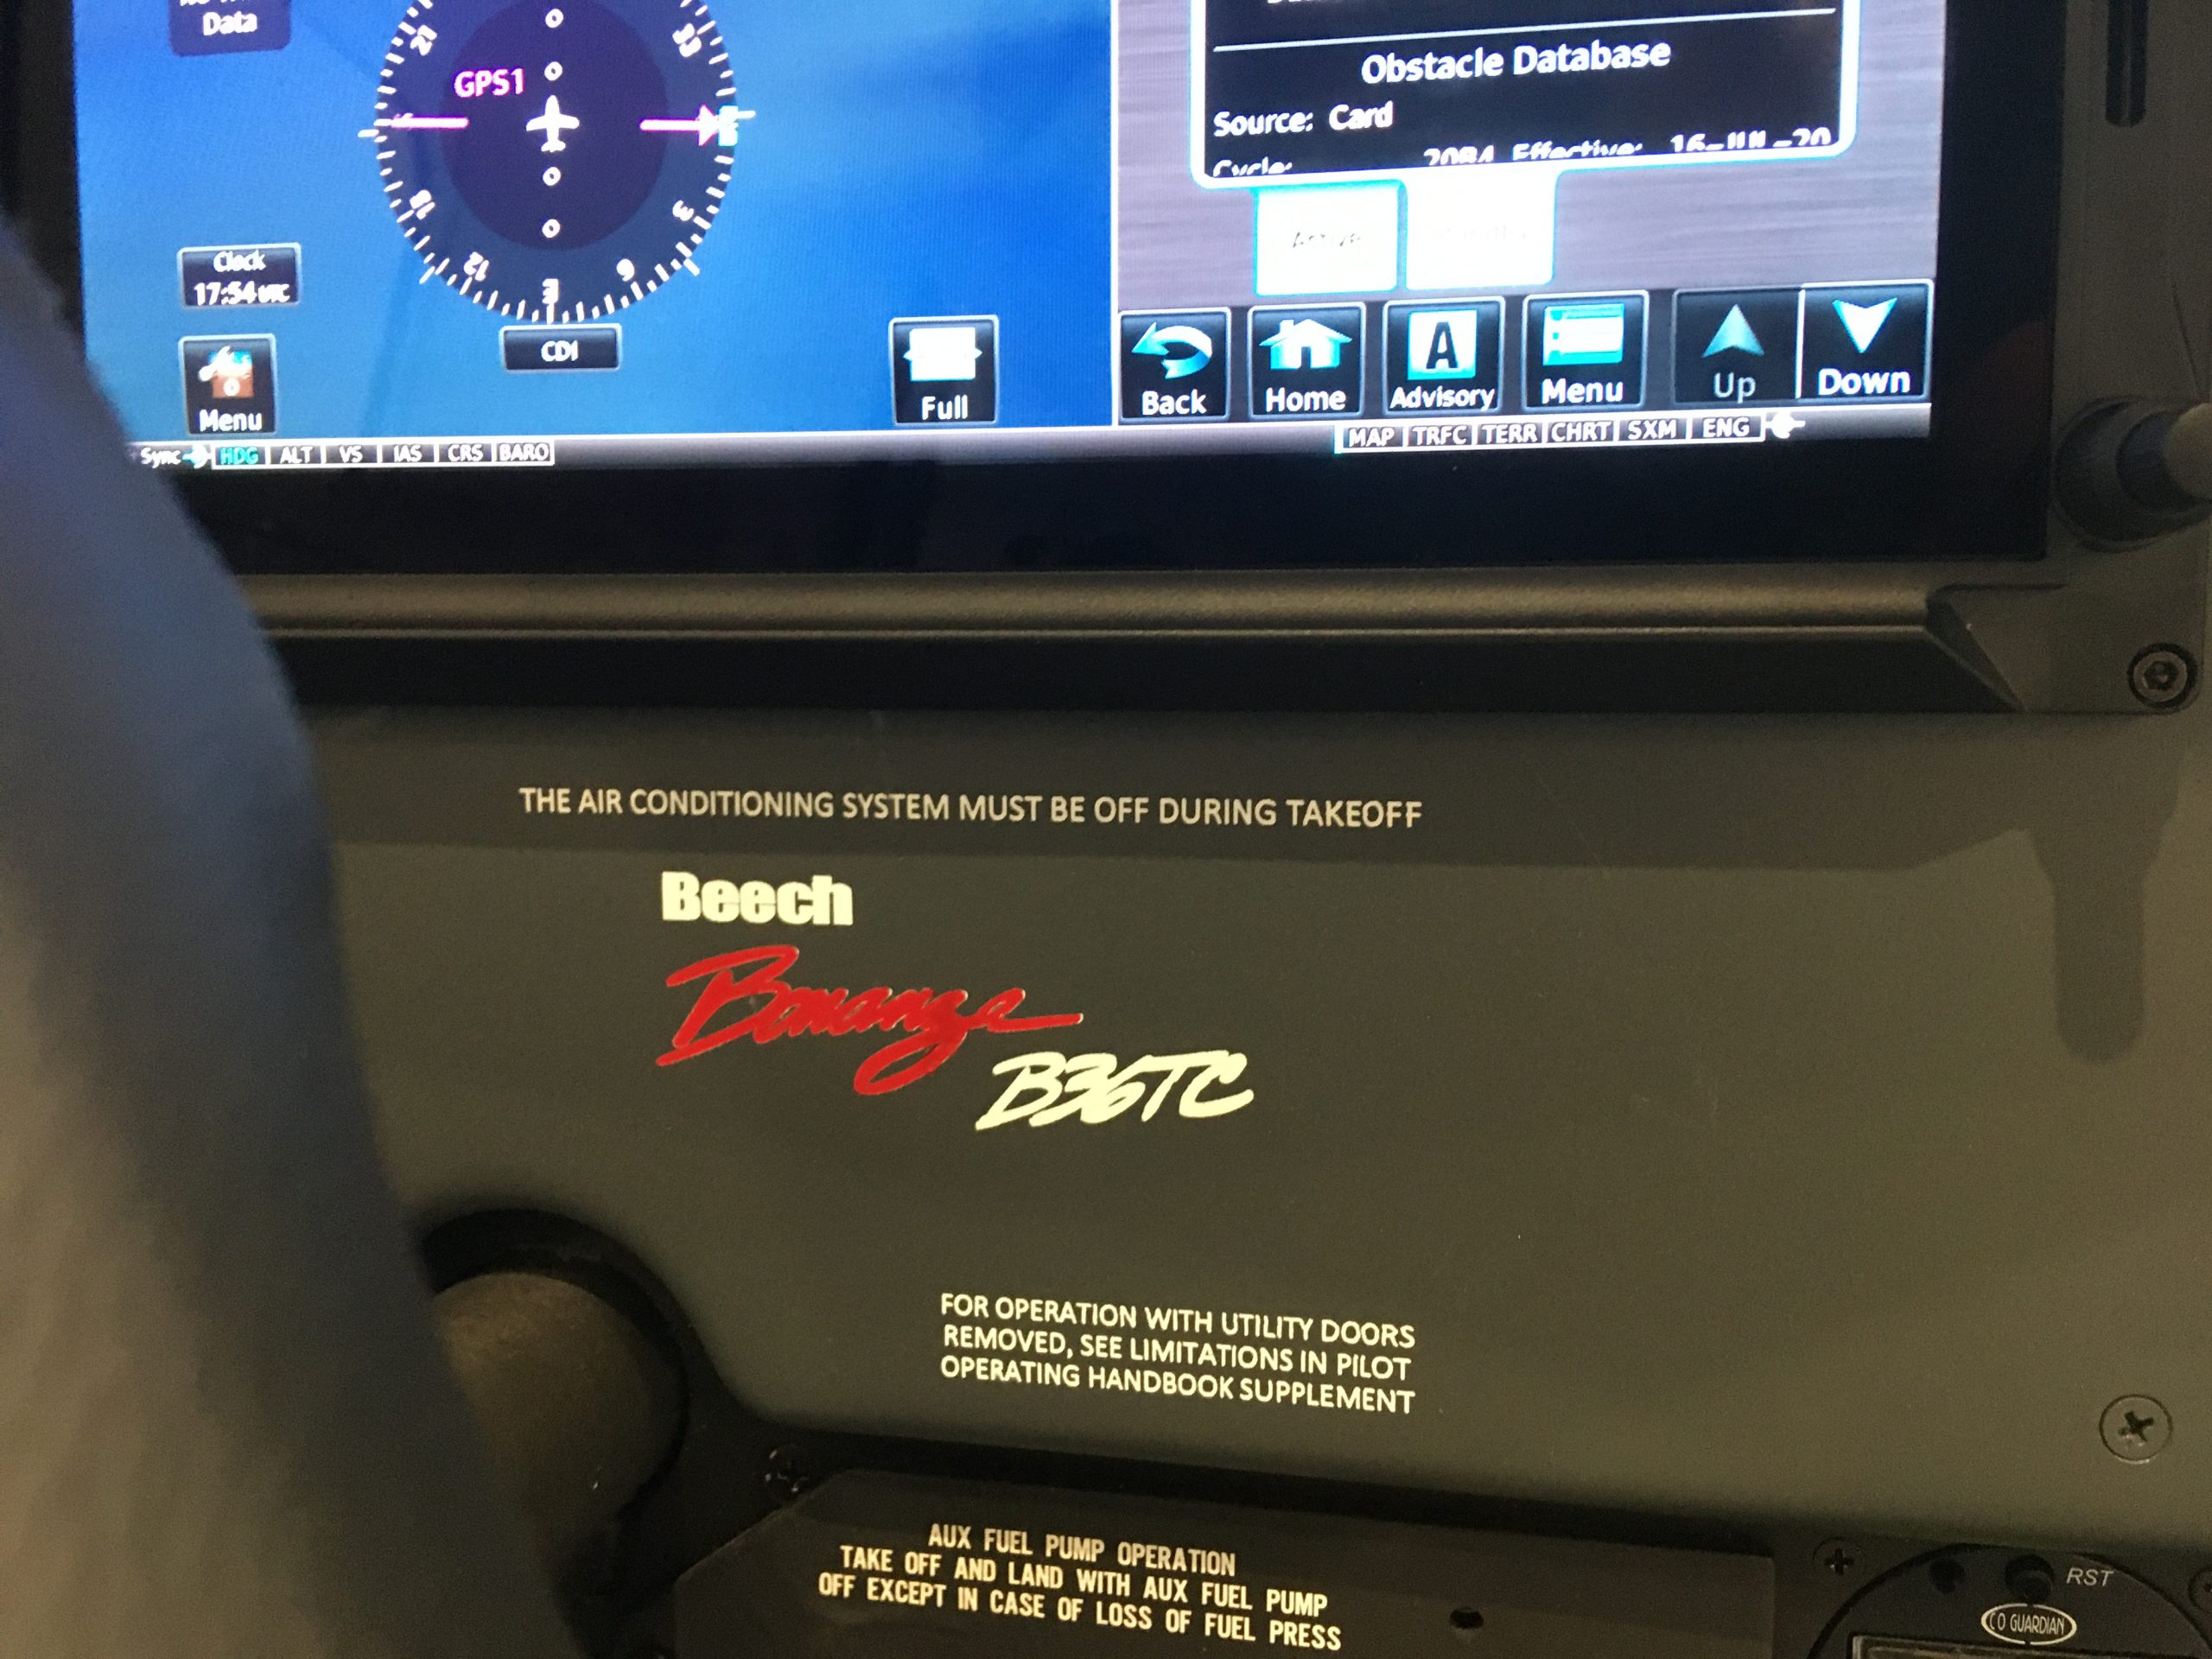
For an upgrade of this size, a new panel to hold all the high-tech avionics is a must. Maxcraft has mastered the art of designing and fabricating new, ergonomic panels with a factory look. We start out by designing the optimal layout considering the entire installation. After the customer approves our design, we cut the panel out of acrylic and install it in the aircraft, along with all the avionics and instruments to ensure there aren’t any conflicts. When we’re happy with the fitment of the acrylic panel we cut the metal panel on our computer numerical control (CNC) router table. After the metal panel is cut, it goes into the aircraft to have any mounting hardware installed before it gets a durable powder coated finish. Once powder coated, we laser engrave all placards, along with the aircrafts tail number and a logo of the aircraft make/model.

Click on the images below to read more about each specific aircraft:
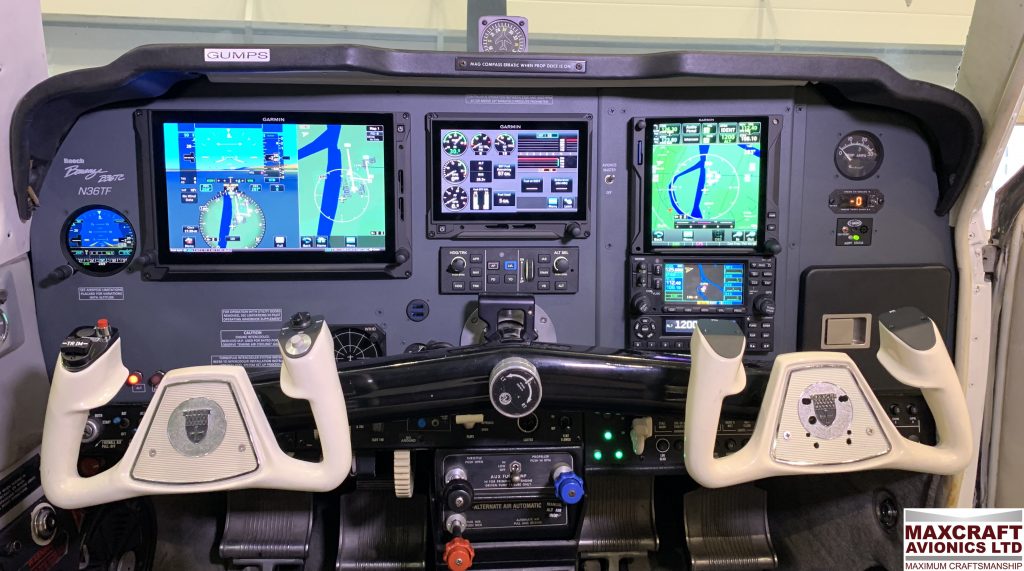
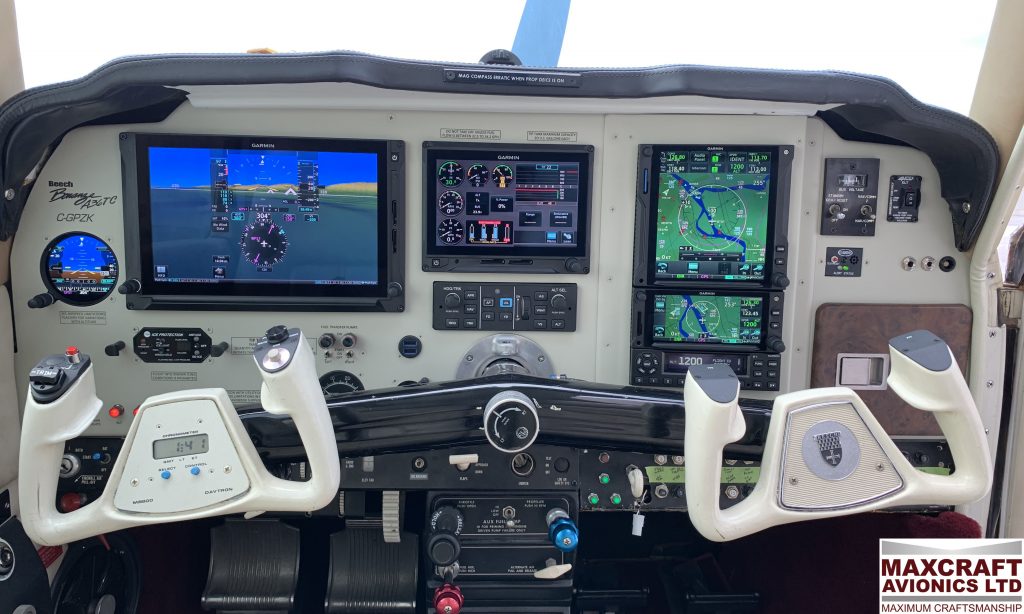
All Three Instrument Panels Showing the Similarities